Mixing in 5.1 can feel intimidating if all you've ever used is the stereo pan slider. But if your timeline is set up right (see Part 1), you've already done the hard part. Now it's about making everything sound intentional.
Here's how I handle panning, leveling, and monitoring so that my surround mixes sound great—even when played back on a laptop.
TL;DR: This guide shows how to mix 5.1 audio using Adobe Premiere Pro's audio track mixer. Includes panning, LFE control, stereo monitoring, and output setup.
Track Mixer vs. Clip Mixer
The clip mixer affects individual clips. The track mixer is where the real surround mixing happens.
Open it from Window > Audio Track Mixer
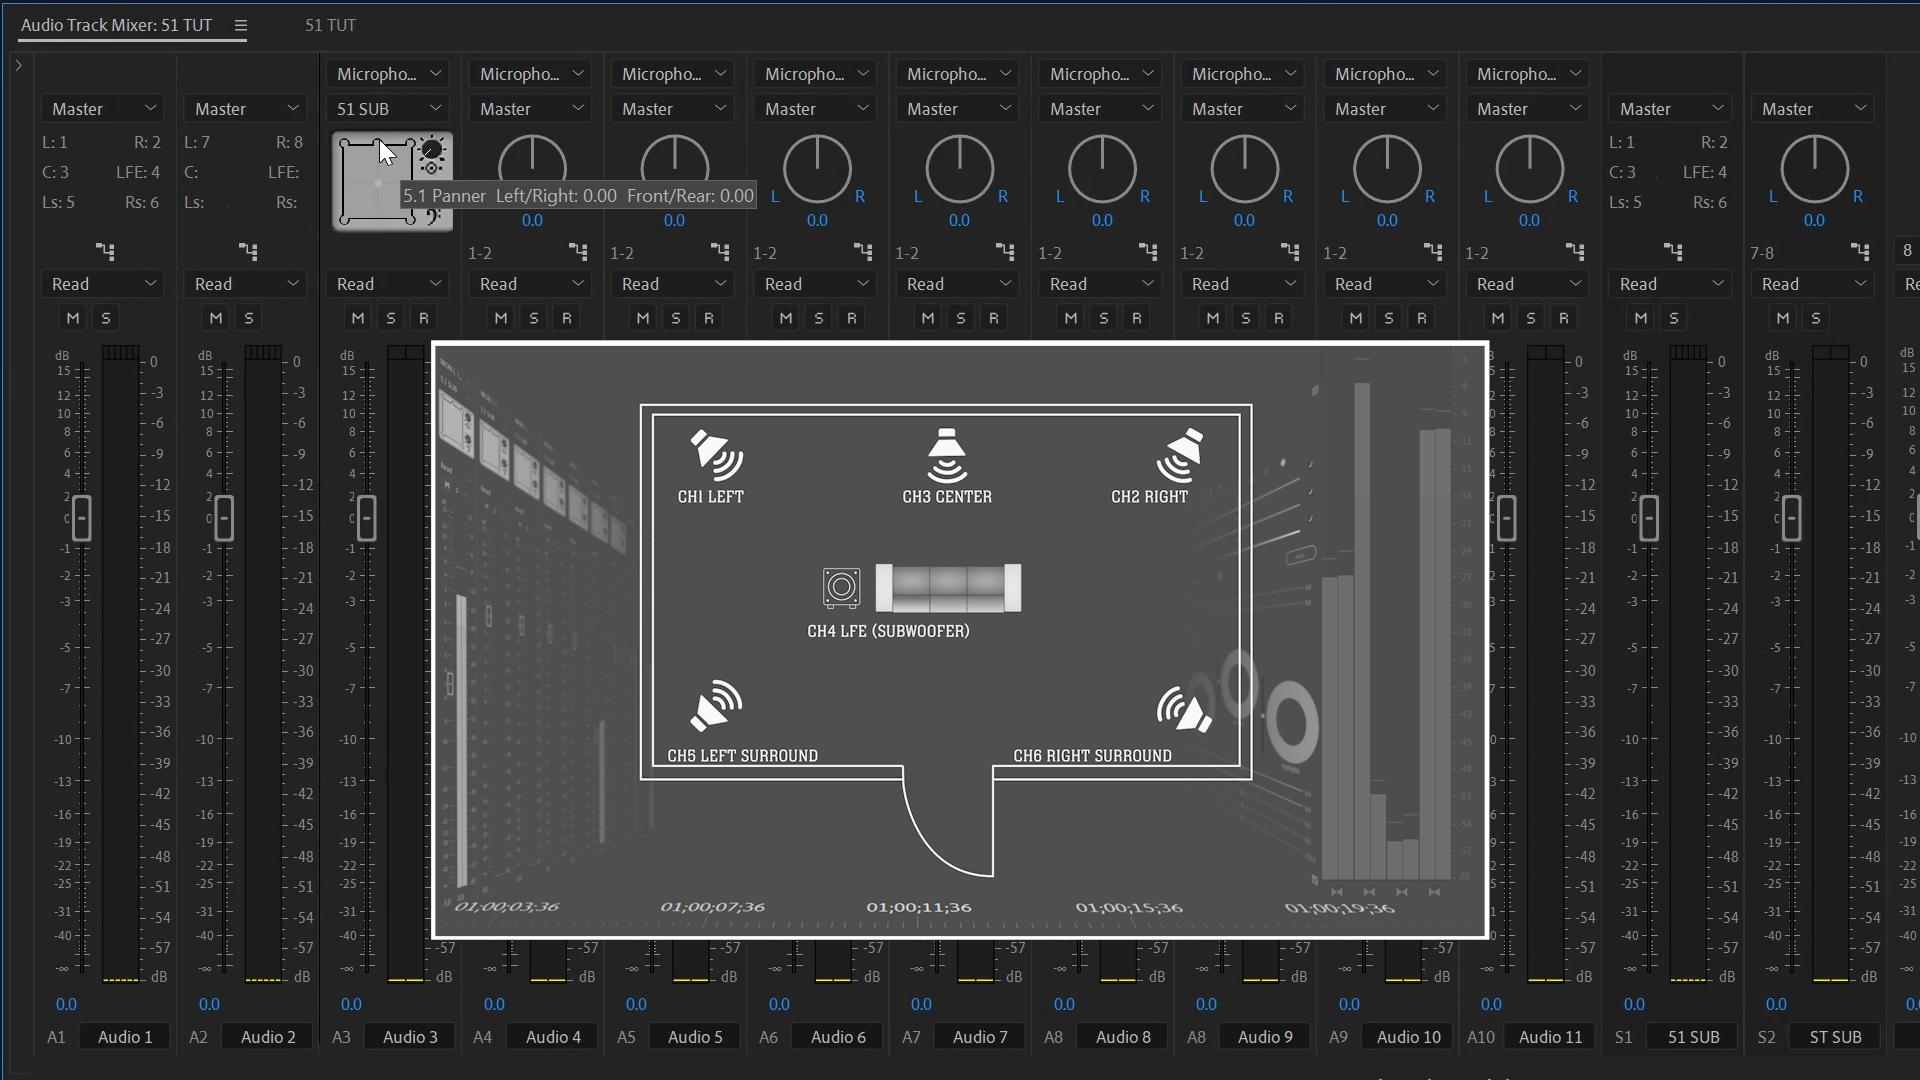
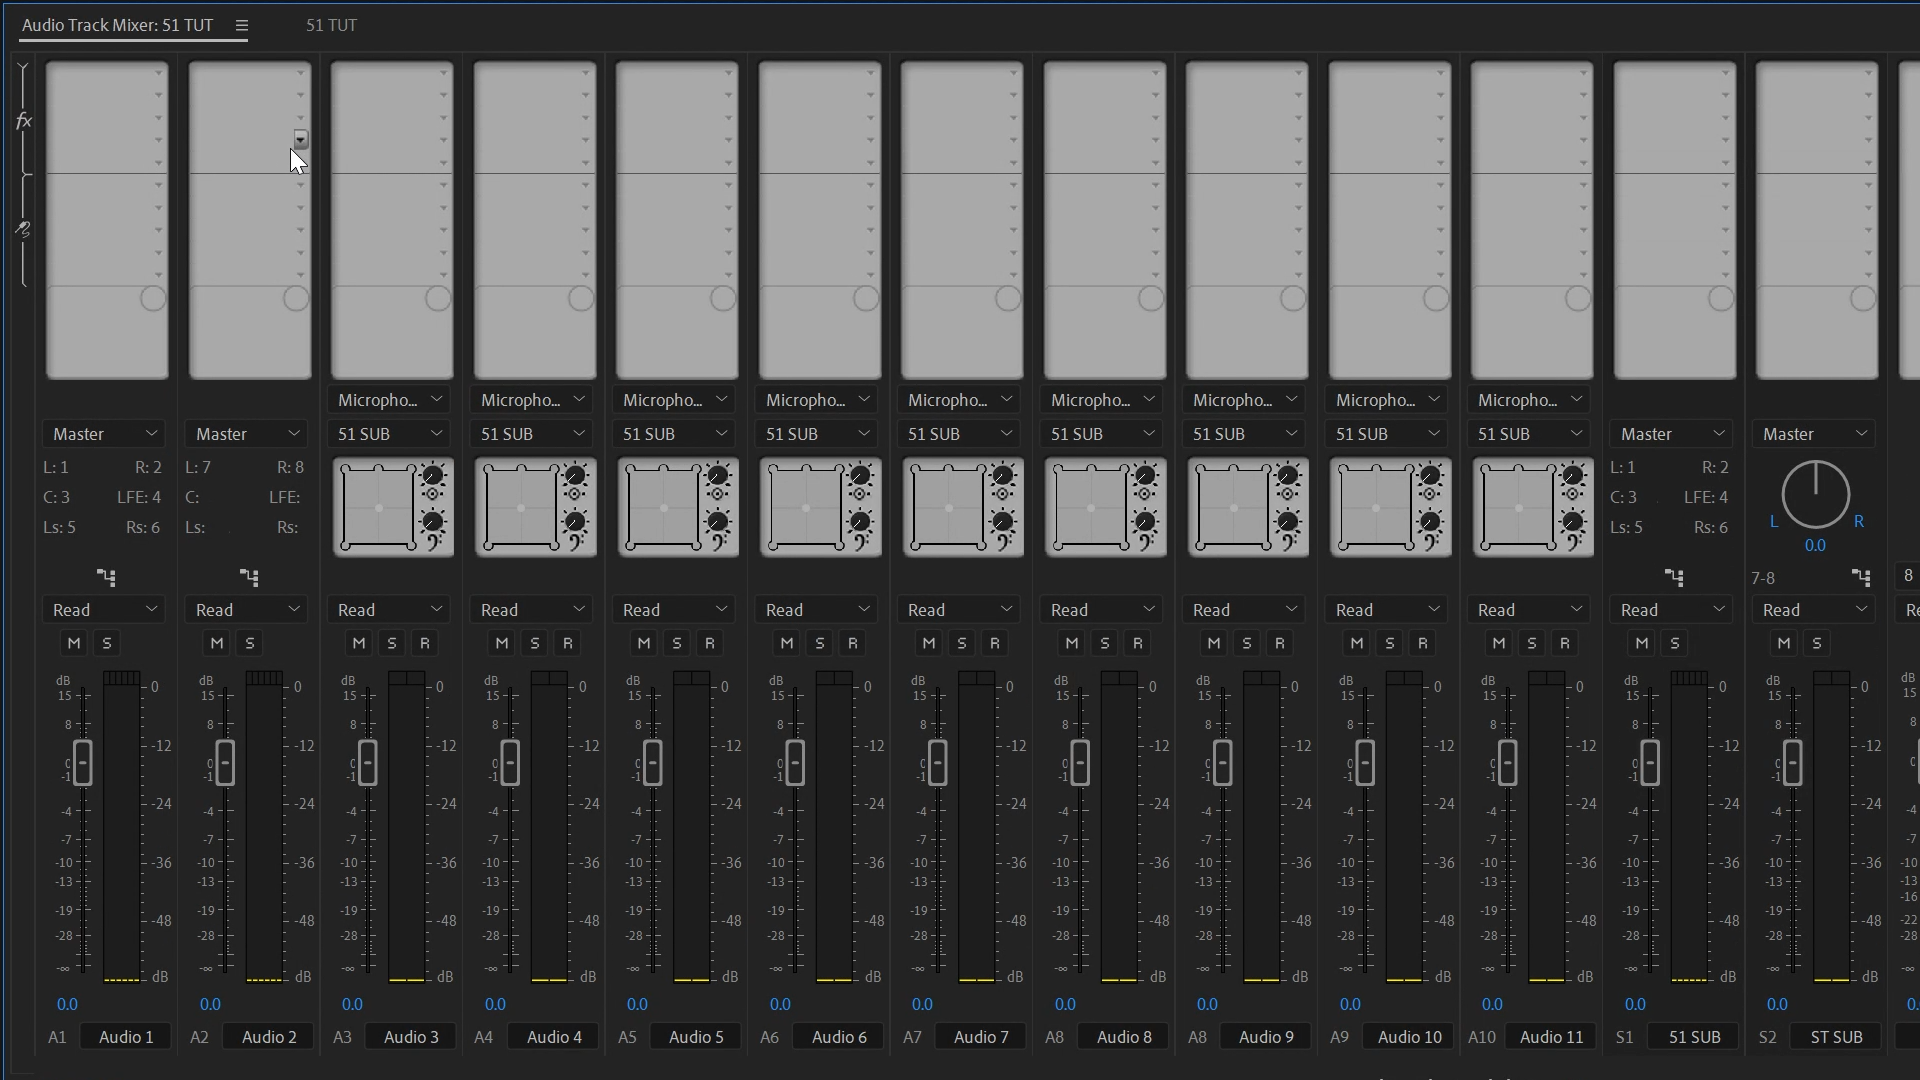
Assign standard tracks to the 5.1 submix
Use the surround panner to place sounds in front, rear, or center
The puck you see is your sound. Drag it around the room.
Managing Center Channel & LFE
Dialog goes in Channel 3 (Center)
Adjust using the Center % knob
For bass, use the LFE knob (Channel 4)
Don't go too heavy on LFE unless you have a subwoofer to verify. I keep music under 39%.
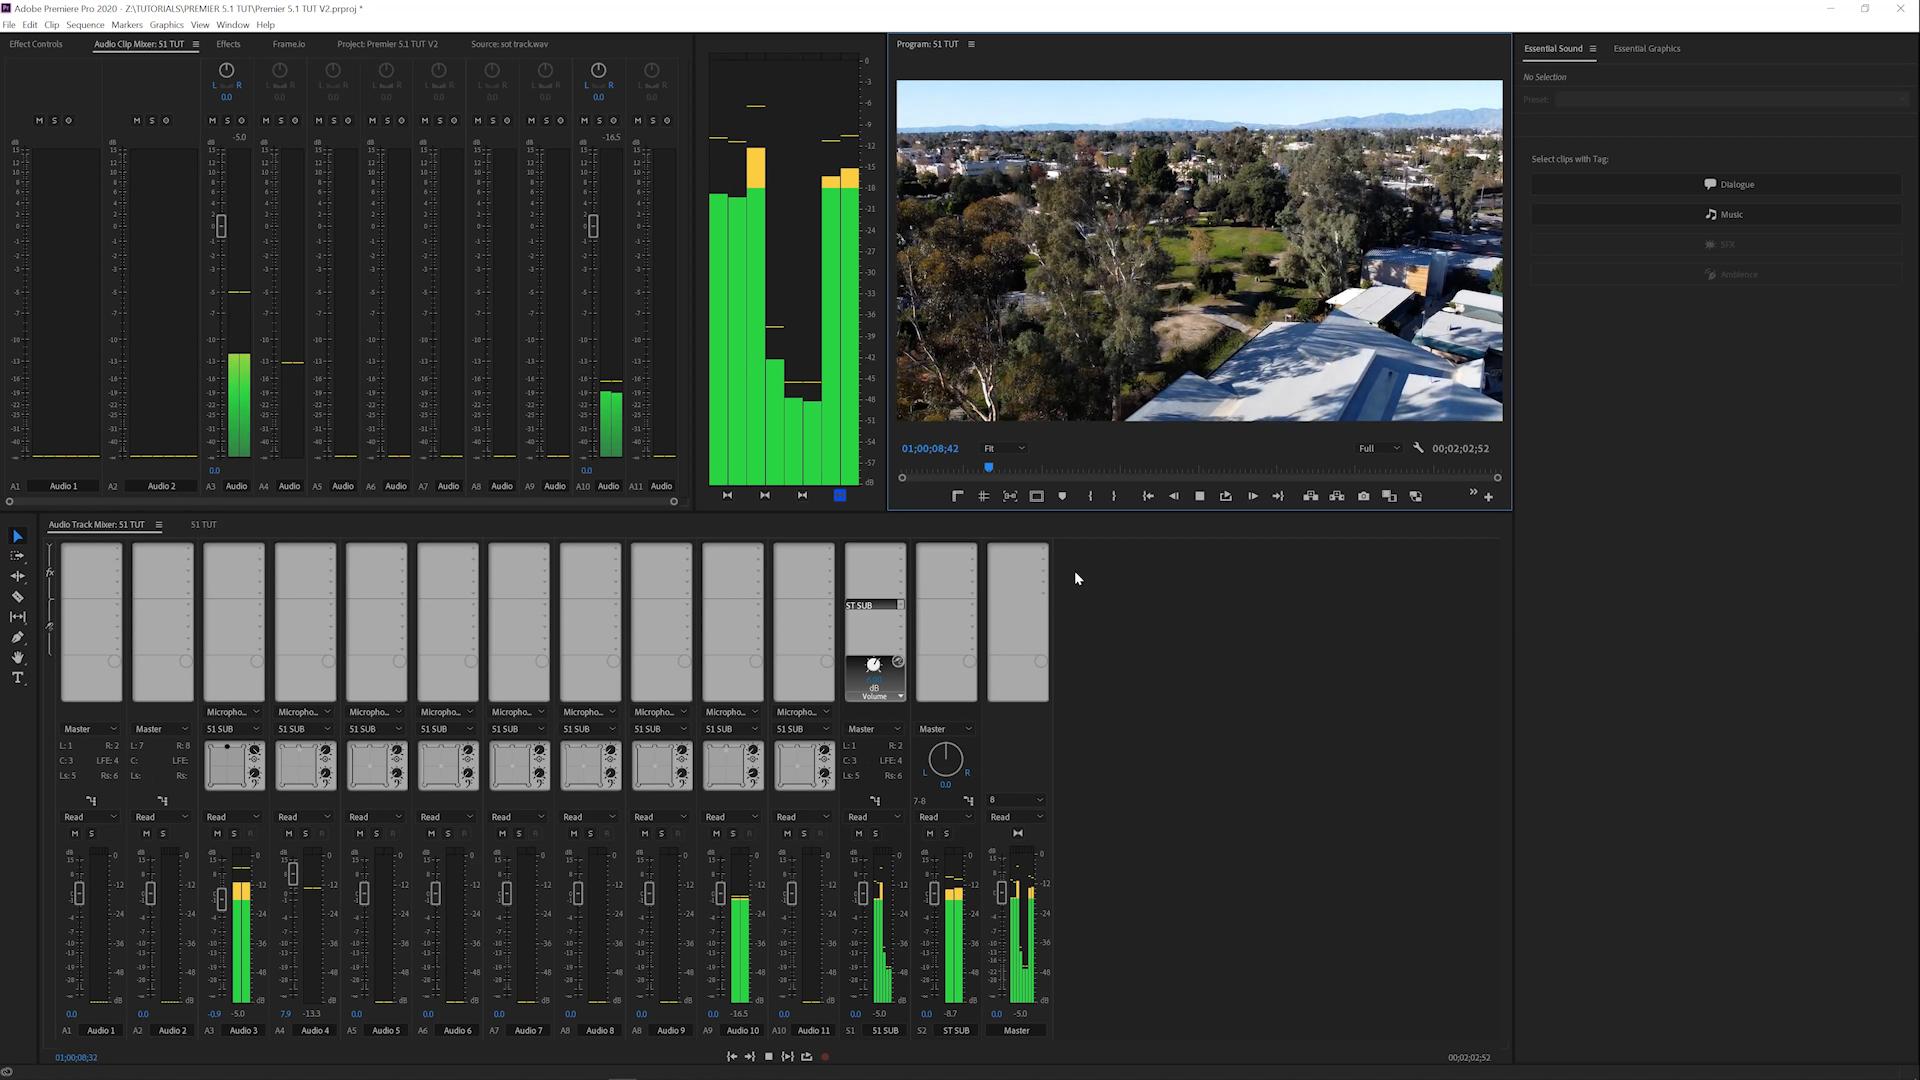
Monitor in Stereo with Confidence
Route your 5.1 submix to a stereo submix (Channels 7 & 8). This lets you:
Uploading image...Mix as usual, even with headphones
Preview what the client will hear
Export stereo and 5.1 from the same timeline
Set your send level to +6 dB. In Premiere 2020+, you may need to adjust manually (default is 15 dB — too hot).
Exporting for Client Review
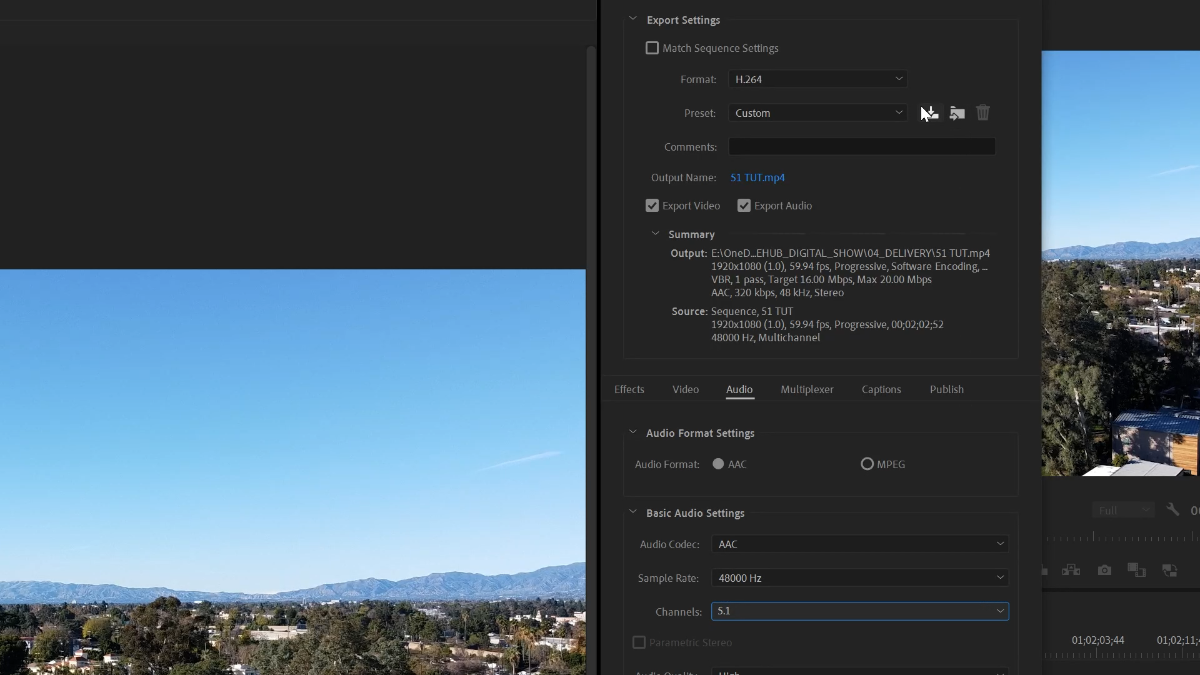
Use H.264 format (YouTube/Vimeo presets work)
Go to Audio > Channels and choose 5.1
Save this as a custom preset
Thanks to embedded metadata, stereo devices will hear a proper downmix—no missing dialog.
Key Takeaway: A clean surround mix doesn't need fancy gear—just proper routing, careful panning, and solid monitoring habits.
CTA: Read Part 3 to learn how to export properly for YouTube, Frame.io, and broadcast masters.